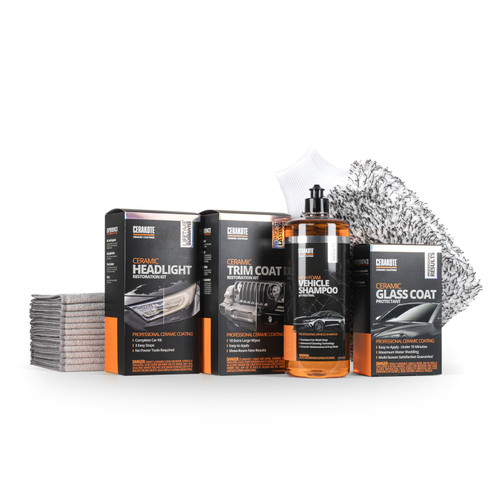
CERAKOTE® Ceramic Headlight Restoration Kit

MSRP: $19.95
$17.97
(You save $1.98 )
(945 reviews) Write a Review
SKU:
AH-HLKIT
UPC:
850014615017
Guaranteed to restore your headlights to like-new and protect them for as long as you own your vehicle!
Adding to cart… The item has been added

Videos Hide Videos Show Videos

The Cerakote Headlight Restoration kit is completed in just 3 simple steps with no power tools required. What makes us different? We manufacture the true ceramic technology that bonds to your headlights, providing long-lasting UV protection that stands the test of time.

  • Each kit Includes enough product to restore and protect 2 headlights. The contents of each kit are:
    • (8) Step 1 Oxidation Removing Wipes
    • (1) Sanding Pommel
    • (4) Sanding Discs (2 of Each Grit)
    • (2) Step 3 Ceramic Coating Wipes


Limited Lifetime Guarantee: Guaranteed to last as long as you own your vehicle, or we will refund/replace your purchase.

945 Reviews Hide Reviews Show Reviews

  • 4
    Watch some videos on YouTube first so you don't make any mistakes

    Posted by Shaun on Jun 22nd 2020

    I followed the directions however when it came to applying the coating it looked uneven after 1 pass. I wasn't sure if this was normal and almost considered wiping it off. A YouTube video claimed that it was self leveling but there was nothing in the directions.

  • 5
    Fabulous product! Just wish I did not sweat like a Moose. This stuff hates water.

    Posted by christopher conan calhoun on Jun 22nd 2020

    Application of product is very easy but will require some manual labor of course. Everything that you needed to do the job successfully was given in abundance. The final step is very crucial to not have ANY water on or near the final application. I made sure that all remaining H2O was removed via air compressor and sitting in the sunlight for an hour or so. I completed the first headlight and it looked amazing. Then I moved over to the second headlight and all was going well... Until one rather large drop of sweat rolled off my nose in slow motion and landed on the headlight while I was applying. Immediately it was ruined. The product is amazing and looks great on my left headlight but my right headlight looks like it got smacked in the face by a grizzly bear Paw. Hope Cerakote reads this and can help a consumer out. moral of the story is where a hazmat suit so you don't drip any H2O anywhere near this product. Great product though.

  • 5
    Great Product

    Posted by Daniel Theberge on Jun 22nd 2020

    Great product! Made my head lights look brand new!

  • 4
    Simple to use and it works!

    Posted by AMoney on Jun 21st 2020

    I've got an older 3 series BMW and over time the fog lights in the bumper started to look really cloudy. I figured I would try the Cerakote restoration kit on them because it it didn't work I probably couldn't make it look any worse. Directions are pretty straight forward and they give you everything you need. Before I ordered the product I watched a auto detailing reviewer try the product out with great results. He used it on a headlight it had taken out of the car which make it so much easier for him to work with. If it's easy enough for you to remove your headlight I would recommend doing so. I didn't have the appetite to drop my bumper so I attempted it the restore with the lights attached to the car. Initially I used some painters tape hoping to protect the paint. That proved useless since the water I'd have to apply just made the tape come right off. Steps were simple enough. 1. Clean headlight 2. Wipe well with Oxidation wipe in circular motion. Use multiple wipes. 3. Wet headlight and red sanding pad and sand in straight lines. (Keep wet while sanding) 4. Move to the gray sanding pad and keep sanding (Keep wet while sanding) 5. Dry the headlight and surrounding throughly. Headlight will look cloudy. 6. Use Ceramic coating wipe in straight line wipes Pretty impressed with the results. I Attached before and after pictures for reference. Getting the edges of the lights i found taking the sanding pads off the grip and sanding by hand helped. Since I was only doing two small headlights I had enough to also do my passenger side headlight which wasn't oxide to bad and it cleared it up as well. My driver sider headlight was replaced a couple of years ago so it didn't need to be fixed but I did have an extra ceramic coating wipe. I figured if I coated the good headlight I would prevent it oxidizing over time.....don't do it. It started to leave streaks which I furiously tried to wipe out. I think I was luck enough to get most of it off but save yourself the trouble and frustration and only use this kit and it's supplies on headlights that need to be restored. Overall, I'm really impressed with the results.

  • 5
    Best on the market

    Posted by Brandon on Jun 21st 2020

    Better than anything else Ive used!

  • 5
    Effective product

    Posted by Christopher sablan on Jun 21st 2020

    Easy to use