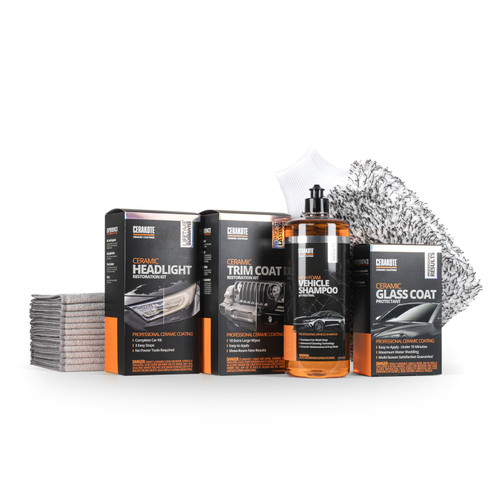
CERAKOTE® Ceramic Headlight Restoration Kit

MSRP: $19.95
$17.97
(You save $1.98 )
(945 reviews) Write a Review
SKU:
AH-HLKIT
UPC:
850014615017
Guaranteed to restore your headlights to like-new and protect them for as long as you own your vehicle!
Adding to cart… The item has been added

Videos Hide Videos Show Videos

The Cerakote Headlight Restoration kit is completed in just 3 simple steps with no power tools required. What makes us different? We manufacture the true ceramic technology that bonds to your headlights, providing long-lasting UV protection that stands the test of time.

  • Each kit Includes enough product to restore and protect 2 headlights. The contents of each kit are:
    • (8) Step 1 Oxidation Removing Wipes
    • (1) Sanding Pommel
    • (4) Sanding Discs (2 of Each Grit)
    • (2) Step 3 Ceramic Coating Wipes


Limited Lifetime Guarantee: Guaranteed to last as long as you own your vehicle, or we will refund/replace your purchase.

945 Reviews Hide Reviews Show Reviews

  • 5
    Hard work, but, worth it

    Posted by Ann on Dec 7th 2020

    This is not as easy as others stated! However, I used the product and it worked well. I didnt mark longevity because this was only two weeks ago.

  • 5
    Amazing Product

    Posted by ShoeGoddess on Dec 7th 2020

    I was soooooooooo scared to do this for fear of jacking up the light covers, making them worse, if that was even possible. When they say don't go over it on the final step, DON'T! Take your time, do exactly as the instructions say, pay attention to the desired results the instructions tell you to look for and you will be amazed. I used this kit on my husband's "beater" car. The headlights were so cloudy, at night there was NO VISIBILITY. It was terrible and with the upcoming time change and it getting dark sooner, I had to do something so he could see coming home from work in the evenings. I read a lot of reviews for many products, looking for the best option with minimal chance of messing up. I tend to overthink things. The reviews on this product were encouraging so I ordered. The bag contains everything you need except a spray bottle with water to keep lenses wet when sanding. Sand the required amount of time with both grits. Dry the lenses really good as water will prevent the final step from adhering like it should. I think it's something like teflon. I used my air compressor to blow all the water out good and let them dry for a little bit. Anyway, if I can do it successfully, anyone can. It took longer than the manufacturer says it does but I was hesitant during the whole process. I think it took me a little over an hour (not counting the drying time) from opening the bag, reading instructions and actually moving through the steps. Great product. I was totally shocked with the results. They look like brand new lens covers. I really should have taken pics. Oh, one more thing. The lenses I did had (3) protruding "tits" that kinda slowed me down somewhat trying to clean and sand evenly around those to evenly work the entire surface of the lens. The rest of the vehicles around here do not have those "tits" on the lenses so if yours is smooth, the process is quicker.

  • 5
    Good product and easy to use

    Posted by Mask Maker on Dec 7th 2020

    Good product. Very easy to use. Just be thorough and take your time. My drivers side headlight has slightly yellowed over 2 years. Passenger side is still crystal clear so I only used the kit on the one headlight. I also had the 2 to compare when I was finished. In the end my yellowed headlight is still not as water clear as the passenger headlight. It is MUCH better and most wouldnt notice. But there still is a very slight yellow tint to it. It is extremely clear but just a slight tint. That being said, if your headlights arent too far gone then this kit will work great. Heavily yellowed and milky old headlights may need professional treatment. I have added 2 photos. Passenger factory clear and drivers side after treated with product.

  • 5
    I can see the road again!

    Posted by Gail on Dec 7th 2020

    Worked beautifully!

  • 5
    Easy to use.

    Posted by A,my Vories on Dec 7th 2020

    My headlights look amazing. I am wondering how long they will last.

  • 5
    A little bit of work for great clear headlights

    Posted by Steve Saunders on Dec 7th 2020

    I applied the headlight kit to a 2007 Mini, which had at least 10 yrs uncorrected yellowing. As the video A/B of the driver's side, which was most yellowed, It worked well. The wet sanding took a while and some effort, and I could maybe have seen some benefit from going longer than given in directions, which were clear and simple. Also having every thing needed, save water, towels and masking tape is a big plus (no power tool for sanding).