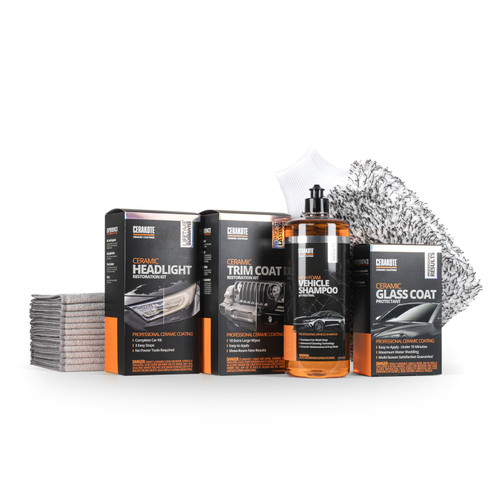
CERAKOTE® Ceramic Headlight Restoration Kit

MSRP: $19.95
$17.97
(You save $1.98 )
(943 reviews) Write a Review
SKU:
AH-HLKIT
Guaranteed to restore your headlights to like-new and protect them for as long as you own your vehicle!
Adding to cart… The item has been added
OR

Videos Hide Videos Show Videos

Cerakote Headlight Restoration is completed in 3 quick and easy steps, with no power tools required. Cerakote is different than other headlight restoration kits because we manufacture a true professional grade ceramic coating that chemically bonds to the headlights and provides UV protection that stands the test of time.

  • Each kit Includes enough product to restore and protect 2 headlights. The contents of each kit are:
    • (8) Step 1 Oxidation Removing Wipes
    • (1) Sanding Pommel
    • (4) Sanding Discs (2 of Each Grit)
    • (2) Step 3 Ceramic Coating Wipes

See our application video and step by step instructions here

Limited Lifetime Warranty

943 Reviews Hide Reviews Show Reviews

  • 5
    Easy to do with clear instructions

    Posted by George D on Jul 18th 2020

    Just completed the Cerakote headlight restoration on a 2001 Mercedes E320. Pretty easy process and my inital impressions are two thumbs up! Took an hour taking my time. Easy of use, clear instructions, and im hoping for the coating to last the life of the car. I will update after 6 months to a year on longevity.

  • 5
    Great product

    Posted by Javahn J Williams on Jul 16th 2020

    great product all positive

  • 3
    I was prepared to not be overly impressed with this product, and I wasn't disappointed.

    Posted by Michael W. Pierce on Jul 16th 2020

    I ended up using the entire kit on one headlight. The first round there was a film over the lens, after the coating dried. With a little hard rubbing with a finger a spot became somewhat clearer, so I did the whole process again with the rest of the kit, on the same lens. Still the same look 6 hours after completing the second round. I used a microfiber cloth to buff the lens. It removed most of the film that was there, and the lens is clearer than when I began this project, yet still not up to my expectations

  • 4
    Overall win but can be difficult to apply final coat

    Posted by martin on Jul 16th 2020

    Overall, great results. See photos for before and after photos. These headlights are at least 20 years old. End result as you can see is awesome! I will say applying the third step can be a little tricky. I messed up the first time (see last photo) but luckily Cerakote honors their warranty and sent me a repair kit to fix it. It took me 3 tries at the 3rd step to get my second light done but it looks great. I would give 5 stars because the end result is clearly well worth the $25, however the 3rd step should be a little more forgiving especially for DIYers. If you miss a spot on the third step you cannot go back over that area or it will cause streaking (as in the final photo). During the 3rd step, DO NOT go over any areas that you have already applied the coat to, it'll ruin the final finish. You can do the overlapping 50% as per instructions but anything further and it will ruin your 3rd step and you will have to get a repair kit from Cerakote. The instructions say one coat only, but really should tell you to do only one pass over any area. Also, watch the video. I can see why there are some negative reviews, but you have to make sure you follow the directions to get the best results. Make sure you sand off any old coating that may be on there and that the lights are completely dry. I did a water test after sanding and all the water slid right off the lights so I feel like that helped having a smooth surface. You will however see micro scratches up close, I feel like that is inevitable, but as you can see the overall result is a HUGE improvement over oxidized lights. Give this product a shot; be patient, prep properly, and apply your final coat carefully, you won't regret it!

  • 1
    Damaged my car, headlights look worse.

    Posted by Book Lover on Jul 16th 2020

    I'm sure I could have done a better job using this, but I watched the video instructions as it suggests on the package. The sanding left scratches in my headlights that are not totally filled with the ceramic, and worse, not realizing it would damage the paint, I scuffed the edges of the paint by the headlights with the edge of the sander and left ugly marks, which I then had to sand with finer paper and polish/wax to hide. The ceramic coating dries FAST, and they don't warn you, but if you run over it again with the coating wipe, it will streak like crazy and look terrible. I sanded the ceramic off and used the other wipe on both lights quickly which worked. I have used other restoration kits with a drill in the past and they worked great. This has damaged my car and been a pain, I do not recommend at all and wish I could undo what its done and get my money back.

  • 5
    This stuff is the bomb!

    Posted by JCRS on Jul 15th 2020

    Oh my gosh!! This stuff is amazing. Put a little elbow grease into it. You can see where it needs more sanding, before the clear coat.